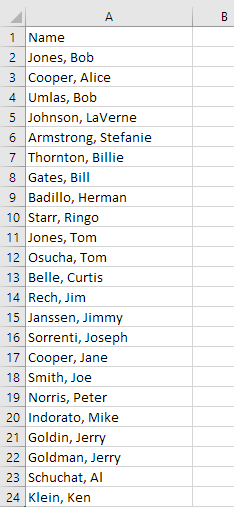
Here in my first blog post, I’m going to show you how to separate first and last names in one cell using Excel. Imagine you have this worksheet, where the name is in column A:
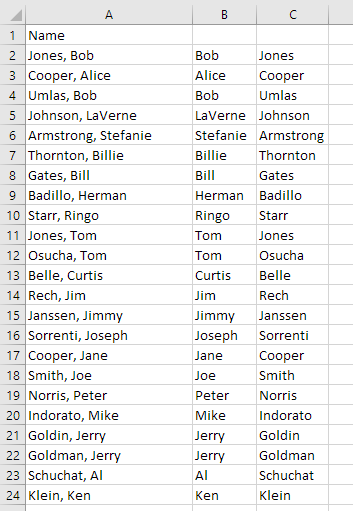
Your job is to separate the first and last names so you wind up with this:
Then you can delete column A.
The 3 ways I’m going to explain here are:
Formulas
Text-to-Columns
Flash Fill (For Excel 2013 or later)
The formula way is the most difficult, but also perhaps most instructive. To do this, I’ll describe the use of some built-in functions, namely FIND, LEFT, and MID.
Let’s also assume that we know the format is always last name, comma, and first name. Let’s look at cell A2 in detail. If we know the position of the comma, we can determine the location of the first name (the last name always begins the cell).
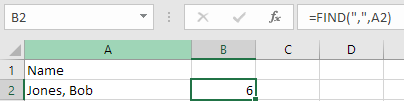
The FIND function does this job. The syntax (rule) is =FIND(what you’re looking for, in what string): If we put this formula in cell B2: =FIND(“,”,A2), we’ll see 6:
This is because the comma is in the 6th position of “Jones, Bob”.
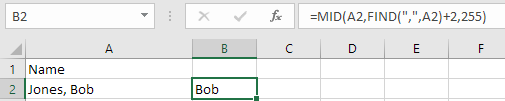
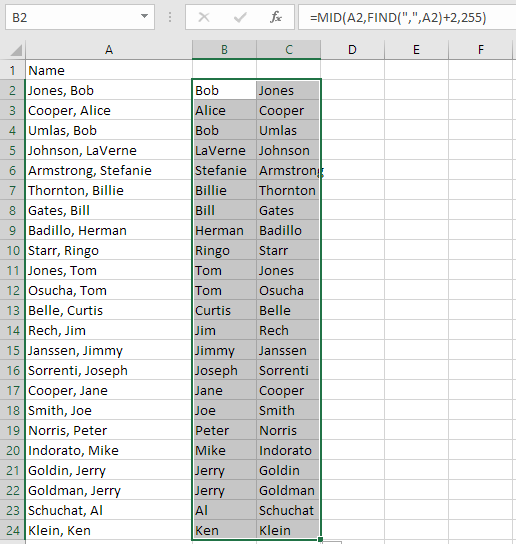
Since the comma is always followed by a space, we then know that the first name is 2 characters after the comma. The MID function takes characters from the “middle” of a string of characters, and the syntax is =MID(cell,start,length). So if in cell C2 we put =MID(A2,B2+2,255), we’ll see this:
Notice that we added 2 to the value in B2. The 255 is arbitrary, but certainly large enough for the largest first name, and also the maximum number allowed in the MID function!
We can combine these last 2 cells’ solution into 1. Instead of using B2, we can put what’s in B2 (the FIND function) and substitute it:
So we are no longer using cell B2! We can delete column B:
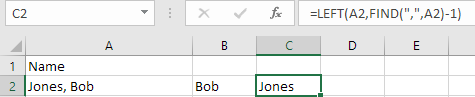
OK, now we need the last name, and put it in cell C2. We know that we want all the characters to the left of the comma. That’s =FIND(“,”,A2)-1. Note the “-1”. We don’t want to include the comma. This is where we need to use the LEFT function. It takes this syntax: =LEFT(cell,length). Well, we know the length is that FIND function with the -1:
Practically done! Select cells B2:C2, and double-click the fill handle (that’s the cursor when it sits on top of the little square at the bottom right of the selection):
It will copy that formula down to the bottom:
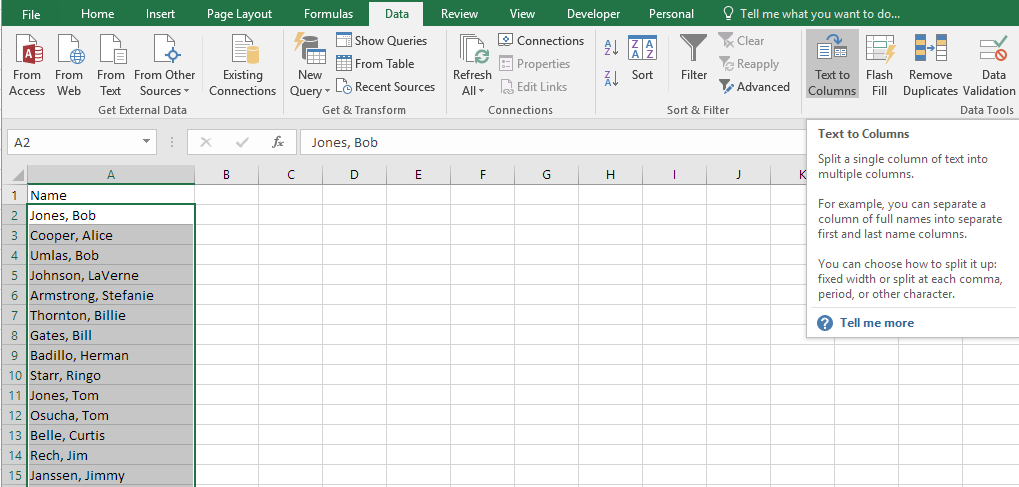
OK, we’re ready for the 2nd technique, Text-to-Columns.
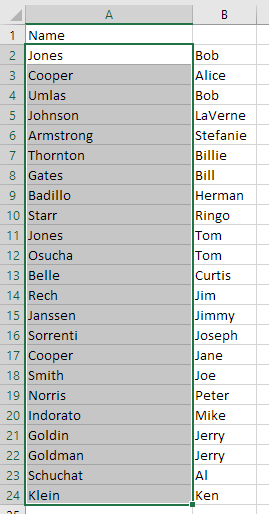
First you select the names in A (from A2:A24), then invoke the Text-to-columns command found on the Data tab:
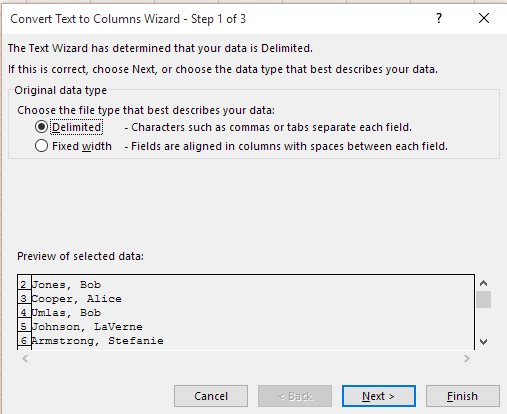
That will bring up a dialog box from which you can choose delimited or fixed width:
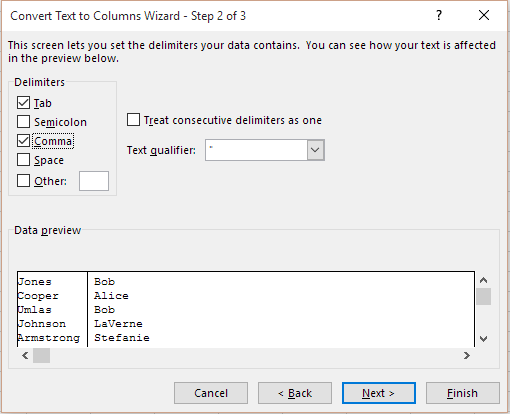
In this case, it’s delimited (by a comma). So click the Next button to see step 2 of 3:
You have to click the Comma checkbox, as it isn’t checked initially. Now click Finish. (You could click Next, but there’s nothing on step 3 that applies to this situation. Text-to-columns can be used in many other situations as well.
When you click Finish, you’ll see this:
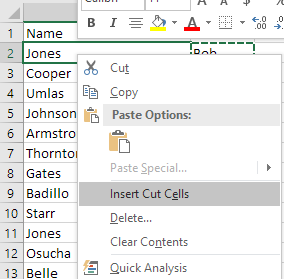
You have the names split, but you have last then first, not first then last. You can select B2:B24, click Cut (or Ctrl/x), then click on A2 (which contains “Jones”), then use Right-mouse click and select Insert Cut Cells:
and then you’re done.
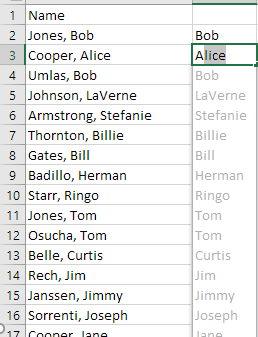
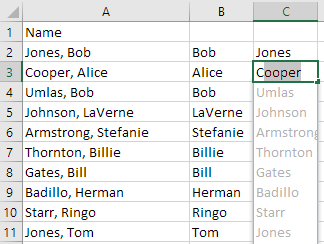
The third technique is only if you have Excel 2013 or later. It’s called Flash Fill. You start by typing the first result (Bob) in cell B2, and continue typing the 2nd result in C2. As you do, you’ll see Excel suggest the rest in a light gray color, because it recognizes the pattern:
All you need do is press enter, and you’re done.
Then go to cell C2 and type the first 2 last names in C2 and D2:
All there is to do is delete column A!
The only disadvantage to the latter 2 techniques is that they’re not dynamic. That is, if you change A2 to Williams, Jared, the data in cells B2 and C2 won’t change. But the formula-based version will change.
Bob Umlas has been using Excel since version 0.99 (on the Macintosh)! He was a contributing editor to Inside Microsoft Excel for many years. He has had more than 300 articles published on subjects ranging from beginner to advanced macros, and on tips, shortcuts, and general techniques using virtually all aspects of Excel.
He was voted an “MVP” (Most Valuable Professional) by Microsoft each year from 1993-2018 (25 years!) for his contributions to the various online Forums about Excel and is known world-wide for his contributions in Excel. He is the author of “This isn’t Excel, it’s Magic!” which is available from http://www.iil.com/publishing as well as from Amazon.com. He has had more than 300 articles published on subjects ranging from beginner to advanced macros, and on tips, shortcuts, and general techniques using virtually all aspects of Excel.
From 1998 to 2018 Bob worked for a major tax and accounting firm, using Microsoft Excel® 8 hours a day, writing custom applications for staff and clients.